Creating a custom dog house is not just a rewarding DIY project—it’s a thoughtful way to give your pet a safe and cozy space. Whether your dog enjoys lounging outdoors or simply needs a private nook, a homemade dog house can provide comfort and protection.
In this guide, we’ll walk you through how to make a dog house from scratch covering planning, materials, measurements, construction steps, and helpful tips. Here you will find how to make a dog house and its not only a guide about how to make a dog house its filled with emotions and much more its all about how to make a dog house.
Table of Contents
How to make a Dog House?
Before diving into the steps, let’s consider why you might want to make a dog house yourself:
- Customization: Tailor the design to suit your dog’s size, personality, and the weather conditions in your area.
- Cost-Effective: DIY can be cheaper than buying a high-quality pre-made dog house.
- Fun Project: It’s a fulfilling task for pet lovers and a great activity for families or hobbyists.
- Durability: With the right materials, your homemade dog house can last for years.
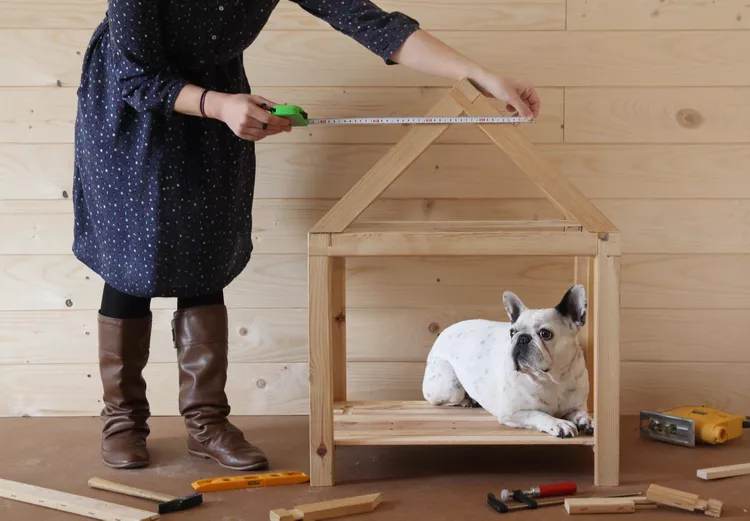
Step 1: Plan the Dog House Design
1. Know Your Dog’s Size
Measure your dog’s height, length, and width. Your dog should be able to:
- Stand up without crouching.
- Turn around comfortably.
- Lie down and stretch out.
Sizing Tip: Add 6–12 inches to your dog’s height and length to determine the internal dimensions.
2. Choose a Style
Popular dog house styles include:
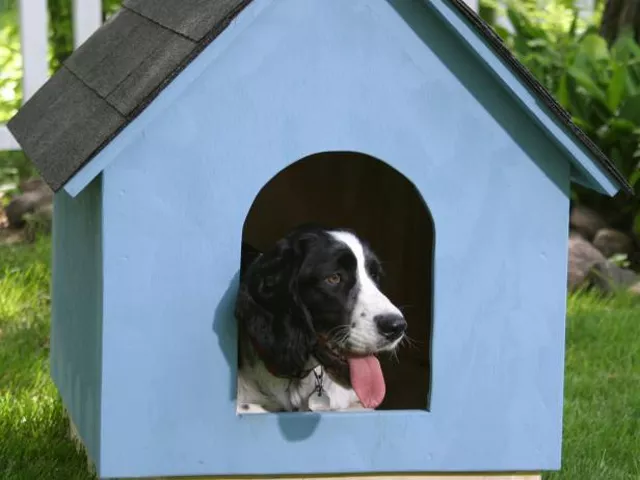
- Traditional Gable Roof: Classic look with good water runoff.
- Flat Roof: Easier to build and great for dogs that like sunbathing.
- Insulated: Ideal for extreme climates, keeps the house warm or cool.
3. Sketch a Blueprint
Draw a simple plan with dimensions. Include door placement, roof style, and optional features like:
- Windows for ventilation.
- Raised floor to avoid dampness.
- Hinged roof for easy cleaning.
Step 2: Gather Materials and Tools
Common Materials
- Plywood or exterior-grade wood: For walls and flooring.
- 2×2 or 2×4 lumber: For framing.
- Insulation board or foam panels: Optional for weatherproofing.
- Roofing material: Shingles, corrugated plastic, or waterproof tarp.
- Screws and nails: Rust-resistant is best.
Tools Needed
- Measuring tape
- Circular saw or hand saw
- Hammer or screwdriver
- Wood glue
- Drill
- Sandpaper or sander
- Paint or weatherproof sealant
Step 3: Build the Base and Frame
1. Build the Floor
- Cut plywood to your planned base dimensions.
- Attach the plywood to a frame made of 2×4 lumber.
- Optionally add insulation between floor joists.
2. Assemble the Walls
- Cut out panels for all four sides.
- Include a cut-out for the doorway on the front panel.
- Attach the panels to the base using screws or nails.
3. Add Support Beams
- Reinforce corners with vertical beams to add structure.
- Ensure all angles are square before securing.
Step 4: Construct the Roof
1. Build the Roof Frame
- Depending on your chosen style, cut rafters or sloped panels.
- Attach the roof frame to the top of the walls.
2. Install the Roof Surface
- Attach plywood panels or roofing material.
- Make sure the roof extends beyond the walls to prevent rain from dripping in.
3. Add Waterproofing
- Use weather-resistant shingles or cover the roof with tarp or plastic panels.
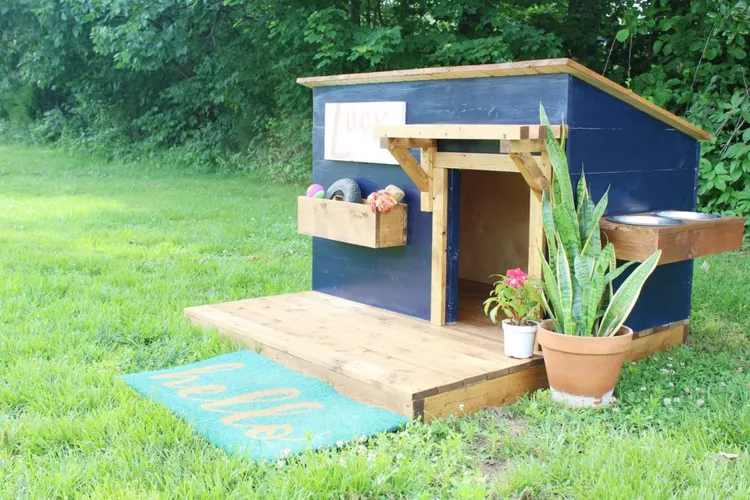
Step 5: Add the Finishing Touches
1. Sand and Paint
- Smooth all edges and corners.
- Paint or seal the wood to protect from moisture and pests.
2. Add Bedding Inside
- Line the interior with soft blankets or a dog bed.
- Make sure it’s easily removable for cleaning.
3. Provide Shade and Stability
- Place the dog house in a shaded, flat area.
- Add bricks or stone beneath to raise it off the damp ground if needed.
Bonus: Weatherproofing Tips
- Ventilation: Drill small holes near the roof for air circulation.
- Insulation: Add foam panels between double walls if you live in a cold climate.
- Heating Pads: Use safe, pet-rated heating pads in winter.
- Cooling Packs: In summer, frozen gel packs under the bedding can help.
Common Mistakes to Avoid
- Too Big or Too Small: A house that’s too spacious won’t retain warmth; too small will be uncomfortable.
- Poor Drainage: Avoid placing the house on a slope where water might collect.
- Overlooking Ventilation: Good airflow prevents overheating and mold.
Personal Experience: What I Learned Making a Dog House
When I built my first dog house, I underestimated the importance of insulation. My Labrador loved lounging outdoors, but during winter, he’d avoid it. After adding foam panels and sealing gaps, he started sleeping inside regularly. Lesson learned—a dog house isn’t just about structure, it’s about comfort.
Another tip: Hinged roofs are a game-changer for cleaning. I initially didn’t include it, and cleaning the inside was a hassle. My next build had a roof that flipped open, making maintenance quick and painless. Here is the best guide about how to make a dog house.
Conclusion: A Comfortable Retreat for Your Dog
How to make a dog house is more than a DIY task—it’s a way to bond with your pet and show them love through thoughtful care. Whether you want a stylish backyard structure or a functional shelter for protection, now you know exactly how to make a dog house step by step. You can visit our website.